Hi All,
I have the 5008 2017+ model which didn't have the option for a speaker upgrade (i.e. Focal option) at the Peugeot dealership in Australia like they do in Europe.
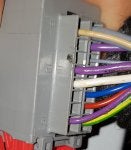
Currently it has the standard 2 front door speakers + 2 front twitters, 2 rear door speakers.
I'm planning to give it an upgrade by replacing the door speakers with a better quality speakers + installing a slimline subwoofer under the seat. Plenty of aftermarket choices from Focal for the door speakers. The subwoofer, however is a different story.
Since there is not that much space under the seat, I need to be extra careful on the selection of the subwoofer unit.
I browsed the service manual and found an interesting "bass box" compartment under the seat. It must be the space that has been allocated to allow the subwoofer upgrade.
I have a PDF snippet on this unit from the service manual but since I'm new I'm not allowed to post the link.
However, it doesn't specifically show what is the dimension of the compartment. I'm guessing this is currently empty. Very curious on what is the depth of this space is like.
Any ideas?
I have the 5008 2017+ model which didn't have the option for a speaker upgrade (i.e. Focal option) at the Peugeot dealership in Australia like they do in Europe.
Currently it has the standard 2 front door speakers + 2 front twitters, 2 rear door speakers.
I'm planning to give it an upgrade by replacing the door speakers with a better quality speakers + installing a slimline subwoofer under the seat. Plenty of aftermarket choices from Focal for the door speakers. The subwoofer, however is a different story.
Since there is not that much space under the seat, I need to be extra careful on the selection of the subwoofer unit.
I browsed the service manual and found an interesting "bass box" compartment under the seat. It must be the space that has been allocated to allow the subwoofer upgrade.
I have a PDF snippet on this unit from the service manual but since I'm new I'm not allowed to post the link.
However, it doesn't specifically show what is the dimension of the compartment. I'm guessing this is currently empty. Very curious on what is the depth of this space is like.
Any ideas?
")